Showing posts with label Project 1 - The Ghost Explorer. Show all posts

Tuesday, 29 May 2012

Easy Fold Book & Box


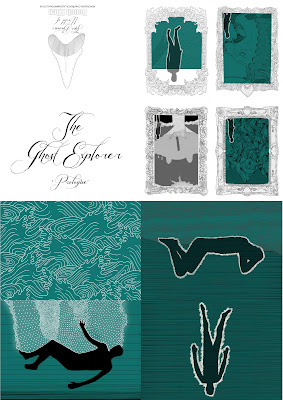
To make the ghost explorer more accessible to people and also so I could sell it at fairs and use it as a piece of self promo, I made easy fold versions of the hard bound book. I broke the book into three chapters, I've only made an easy fold version of the first chapter (which I have entitled prologue) so far for the deadline but the Plymouth College of Art Summer Show 2012 I want to make multiple versions of all three chapters.
For this project I wanted to find a new way of packaging my easy fold book so I asked Laura if she could show me how to make the boxes she makes for her Resin toys. I decided i'd use cream card for the top of the box and blue for the bottom because it looked like sand/rock and the sea which obviously works for the story of the ghost explorer. I then digitally printed the title on the top and put them together which ended up being very tricky and fiddly without nails but they were done.
I then completed the package with a business card. For the summer show and New designers I was going to make little goodies like laser cut badges and prints in there as well so that it's more of a promotional package.

Sunday, 27 May 2012

Book Binding & Finished Book


Firstly to make the book  I trimmed all the pages so that they lined up with one another and then I sewed all the pages together adding on the title page and the hand made marbling paper end pages.
One difficulty with this was that I couldn't trim or sew the book like you normally would because of the fold out pages with the quadruples on, in the end though the book sewed together fine although they could have been a bit tighter though the quadruple sewed in fine. 
I then cut the screen printed calico to size to make the hard back front cover. I then measured the card that makes it hard back, about 1cm longer and 5mm wider than the bound pages and worked out by the thickness of the bound page the size of the spine. I then laid out the card on the backside of the cover to work out where I was going to glue them, I then rollered out a thin layer of PVA glue on the card and stuck them to the cover, the corners of the calico where then cut and the extra material was wrapped around the card, this needed to be done ultra quickly so that the glue didn't dry. I then put a thin layer of glue on the card and stuck the marbled paper to it, the book was then pressed under the weight of a pile of books. I was then done.


Challen-ging Drawing

For this project I wanted to challenge myself to drawing people and not only people but beautiful women and other such lovely things.

Printing

I was a bit worried about printing the pages because the front cover was exactly A4 but then I realised that when you print there is a good enough boarder around the page so that it would work. Firstly, I did a test print on the black and white printer on normal paper and it came out looking good so I decided to put in the hand made paper I'd acquired in Totnes.

Unfortunately, because of the texture of the paper some of the images came out unclear and even more the ink didn't stay on the paper and smudged therefore I was unable to continue using it. So I decided to just continue using normal printer paper but this made the page look cheaply printed which I didn't want so I then bought some nicer thicker paper.


Though still in black and white the image looked quite cheaply produced and another thing was that because I was flipping the paper over in the printers the two middle lines on each side of the page didn't line up. So I went down to Bretonside printers to get it printed on the same paper but in colour so that they could line up the pages better and also I was going down there to print out the A3 quadruples anyway. They came out really nice and I was really pleased with the end result.

Planning & Storyboard

Before making the illustrations for the book firstly I wrote the story out working out how many pages I needed to have to fit everything I wanted in but also the right amount of pages to fit in the book for they have to go in groups of 4 double page spreads. I then worked out a story board for the story.


The Drawing Process

The first thing I did was story board what I wanted the image to look like.
Then I had someone photograph me in the position of the image.
Then I printed out the photo and light boxed around the outline on my shape.
  
This was then scanned and taken into photoshop and filled with black. 
I then using the outline as a guide, on the light box, I hatched around the line to make the aura.
  
 This was then again scanned and taken into Photoshop and put around the silhouette then coloured an off white to make it look like light. I then put the colour underneath to make it stand out more and obviously to illustrate that he's in the sea.

I then turned down the opacity of the silhouette to make him look more ghostly and put the lines in the background to show he's in the depths of the sea. I like that you can see the lines through the silhouette. 


Adding in Words

For this project, unlike projects i've done in the past, I wanted to add in words to tell the story so that the illustrations didn't have to tell the story by themselves. Though once I started adding in words to the illustrations it ruined it slightly or the words were too illegible. The answer I came up with and was backed up was to put all the writing in the beginning of the book as a sort of poem/sea shanty, which works a lot better for me and for the book in all.

Front cover

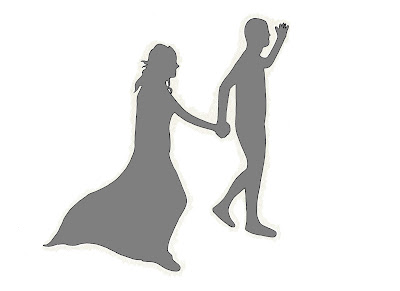
For the front cover I used the iconic image from page 6 but simplified it because I wanted to screen print the front cover so I just made the lady a soft silhouette of cream which I thought really worked because the ghost explorer is a harsh black silhouette.

For the font I wanted to have a quite hand drawing font which looks like it's been written with a quill and ink but still legible and the font I found worked perfectly for that though I was a tad worried about how it was going to come out when screen printed.

When mixing the ink colours for screen printing I realised the cream I wanted for the lady/aura was a tad too light for I wanted to make my front cover out of calico because it was close to material I used in the book binding day. So I made a more golden colour so that I still showed up when printed.

Unfortunately because the print was a three colour print the lining up wasn't perfect although the images themselves came out really clear, even the type which was good.

The Quadruple (Part 3)

For this page I wanted to show the same four illustrations again but with all the images looking really happy with the ghost explorer and the lady. Though it was said it would be nice to just see them hand in hand going off to the next chapter of their life.

Though I then realised because of the issue with printing A2 that i'd have to decide whether to have this image or not and in the end I decided not for I think it's a weaker image than the page before which was the other page i was debating to lose.

Page 13

In this image I wanted to show that the lady was now dead and had found the ghost explorer so that they can be together.

Page 12


In this illustration I showed the lady throwing herself peacefully because she wants to be with the ghost explorer, I got the idea for this from the Twilight New Moon film where Bella tries cliff jumping and almost kills herself. I also wanted it to be a beautiful death without blood or breakage and that she does just die almost in her sleep with no pain.


Page 11

For this illustration I wanted to show the lady mirroring how the ghost explorer's feeling also mirroring his pose in page 10. At first I was going to have her sitting on the same rock she first saw the ghost explorer on, but that would mean the next page won't flow on as well so I had her sitting on the edge of a cliff.I was then told that it looked like she was sitting right on the edge of the cliff because of the creases on the dress so I removed the creases and it looked better and less on the edge.


The Quadruple (Part 2)

For this quadruple I used the same four illustrations but with slight changes to each one to show that the ghost explorer is sad, in the mountains and walking on water the whole image is darker, in the Cancinos and the Chimera they're sad with the ghost explorer. Another thing I was told would be a nice idea was if I made the fold out come out downwards because when he's happy the page folds out upwards so when he's down the page comes down.

Page 10

In this page I wanted to show the ghost explorer sad and just thinking about her. I used the same layout as the first version of page 6 but it worked more because he is in a different position.

But then I realised that if i used this version then i'd have to change the rock texture to the sedimentary rock. Once I did this I think it worked.

Page 9

For this page I wanted to make an illustration which was like the scene in the little mermaid where Ariel saves Eric and lays him down on the beach, though this is the beginning of the ghost explorer feeling sad and realising that he and the beautiful lady can't be together, like a nautical Romeo and Juliet.  

Page 8

In this scene I wanted to show that the lady is slowly drowning and dying but not yet dead. To do this I used the same technique I did with drawing the ghost explorer but didn't turn down the opacity as much to show she's slowly 'fading away'.

Page 7

In this page I wanted to show a long shot of the ghost explorer and the lady swimming down to the bottom of the sea. Again I used lines to show the depth of water.


Page 6

This is the iconic image I had in my head of the ghost explorer looking and falling in love with the woman on the shore. I took me a little while to work out the balance of the page because I wanted him to be underwater looking up at her and her above water looking down at him. In the end I had her standing on an outlying rock so you could also see the rock under the water.
The real challenge was to get the lady looking beautiful and also her dress looking like it was blowing in the wind but after playing around with the look of the dress I think it works. Once this was done I used the cream colour of the ghost explorer as her colour sort of saying she's like light /sunshine/ goodness/ goddess.

Page 5

In this illustration I wanted to see him generally walking near or on the shore exploring. In the story boarding process I made three versions of the page but I went with him walking underwater on the shore so that it flowed into the next page easier. When making this page I had to work out how to illustrate two new things - the underside of the surface of the sea and sand. For the underside of the sea I used the vine pattern I usually draw but with the lines further apart which worked and for the sand I used the technique I used in Larus Island with dots and to show perspective I made the dots get closer and closer together as you go further into the distance.

Page 4

For this page I wanted to show the ghost explorer reclining in his home on the bottom of the sea. I found getting the right positioning to show him reclining really difficult because he is a silhouette but I was able to use his aura to define his parts.
But once I made this page I was told it wasn't obvious of what it was so I redrew the entire illustration again with him laying flat on the rock instead of on an angle.

Also I was told that I needed to define what was deep sea and what was rock so I made a pattern which looked like sedimentary rock.